About this deal
With MQTT, resource-constrained IoT devices can send or publish information on a specific topic to a server that acts as an MQTT message broker. Recently I added a second PZEM on /dev/ttyUSB1 and after working well for some hours, both sensors became unavailable. I am trying to connect a PZEM004T (without display) to a USB port on my PC via a USB-TTL adapter board. Also, given that the purpose of a forum like this is for users to share their ideas an projects, so that others can benefit it would be great if some have success in getting the PZEM modules working well with the RP, to provide enough details to enable success for others to also achieve the same goal.
Assistance with Modbus and PZEM-004T - Configuration - Home Assistance with Modbus and PZEM-004T - Configuration - Home
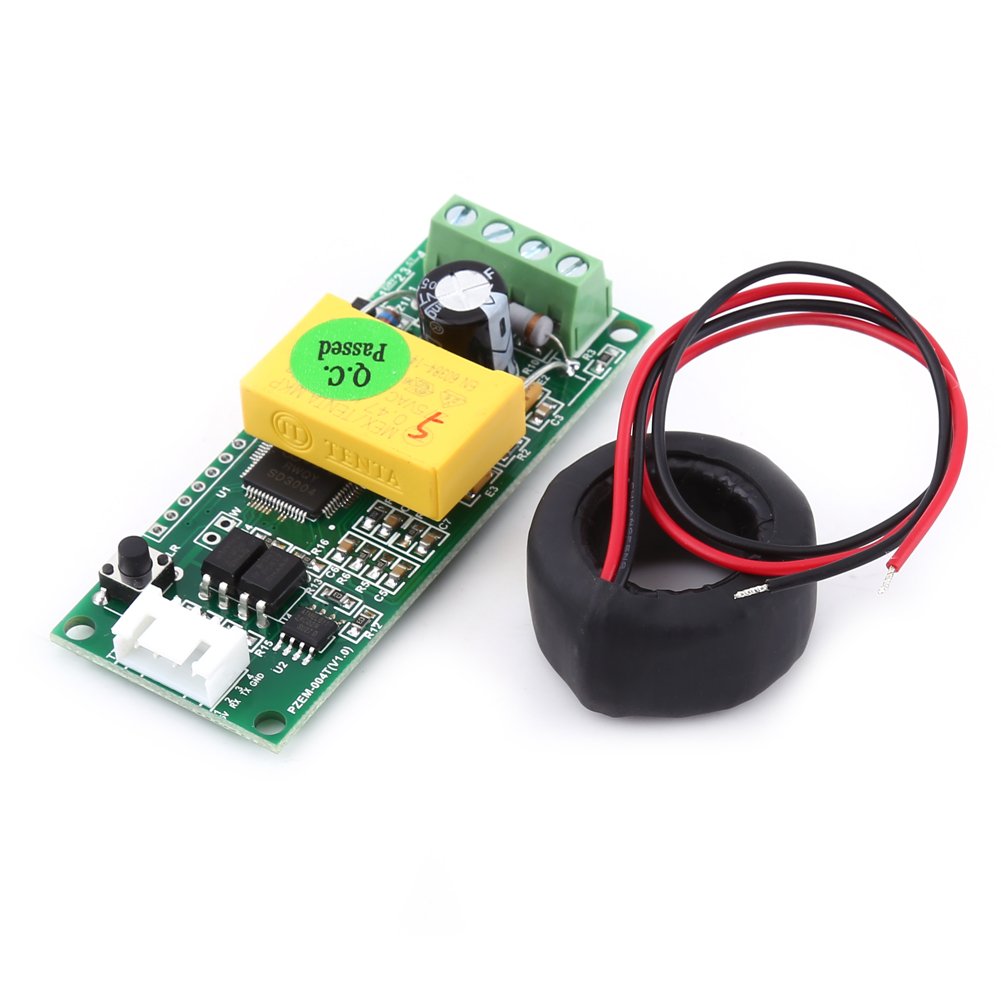
Internet of Things Stack Exchange is a question and answer site for builders and users of networked sensors and control devices in the contexts of smart homes, industry automation, or environmental sensors. mΩ, so that the 1 A current shares 900 mA through the second burden, and 100 mA through the instrument, and pro rata at lower currents. It is capable of measuring four interrelated electrical variables as voltage, current, power, and energy. Just one thing comes to my mind, the pzem004t v1 and v2 (not sold anymore) need the pzem004t component in esphome. This module features a TTL serial data communication interface, you can read and set the relevant parameters via the serial port; but if you want to communicate with a device which has USB or RS232 (such as a computer), you need to be equipped with different TTL pinboard (USB communication needs to be equipped with TTL to USB pinboard; RS232 communication needs to be equipped with TTL to RS232 pinboard).The solid-core CT that came with it is rated at 100 Amps max, but I have no data on its secondary rating. with Current Transformer (CT), Load and Arduino in full can be seen in the picture below : Wiring PZEM-004T with Load PZEM-004T V3. Ich habe die Variante mit den Tasmota Befehl selber noch nicht getestet, weil mit dem Herstellertool kann man super auch kontrollieren, ob die Adressierung stimmt. After setting-up the Cayenne Dashboard, we must test the PZEM-004T V3 meter before interfacing with the dashboard. That’s very unfortunate but I can assure you nobody will be able to help you properly if you don’t provide logs.
AC communication module PZEM-004T V3.0 User Manual
Note: Reply power data is D1D2 = 08 98, converts 08 98 to decimal is 2200, so the current voltage value is 2200W. Note: Reply voltage data is D1D2D3 = 00 E6 02, 00 E6 represent the integer-bit of the voltage, 02 represent the decimal of the voltage, the decimal is one digit, converts 00 E6 to decimal is 230; converts 02 to decimal is 2, so the current voltage value is 230. PPPS: i've removed from the code the debug and logging code, so maybe i left some typo or formal mistake. PS: remember that even if you give power on the "serial side" of the device, it will work only if it's connected to mains.Be sure to crimp connectors and use heat-shrinking tube wherever possible/needed, and tightly secure any screw. Alternatively, I'll mount the module in a case next to the DB board and increase the length of the USB cable to the Pi. Ansonsten schauen ob alle Spannungen ankommen, dass es keine Kontakt Probleme gibt, Durchgang messen. I am looking at reading higher current reading with a PZEM-004T energy sensor but I am not able to find any specks on the sensor that Indicated what the Maximum current is that the sensor can handle from the ct. Alles nach folgendem Schaltplan verschalten (Pzem-004t Module müssen mit 5V Spannung versorgt werden, nicht sichtbar auf dem Schaltplan).
PZEM-004T V3 V3.0 Interfacing Program Using Example of the PZEM-004T V3 V3.0 Interfacing Program Using
Den COM Port auswählen und nun kann man unter “Set Parameters” die Adresse bei einem Modul auf 2 und das andere auf 3 ändern.
Run the wire through the circular sensor and you`re ready to start measuring the voltage, current, and power. If you need 5V you can use directly from Sonoff (for something else) but do not connect to PZEM logic because this will result in a big flash (kaboom! Achtung: Von Windows könnte eine Sicherheitswarnung kommen, einfach auf “Weitere Informationen” klicken und “Trotzdem ausführen” ! You will most probably get a warning in the logs about the wrong stop_bits but maybe it will report values then… github. These devices have optocouplers on the UART port and the resistors mounted on the board have been designed to work with 5V devices.
 Great Deal